
This form will be embeddable to multiple static websites! So you're only doing this once.
Disclaimer: Once you've got this set up you need to figure out how to send emails yourself. Check the ending before you start this.
The finished product will be a:
- HTML form that sends the users email to FlowXO
- A FlowXO webhook that holds the secret API key and calls the Mailgun API
- Mailgun mailing list that is later used to send emails
Those are also the 3 steps we need to complete, except backwards and intertwined. Oh joy! Let's get started.
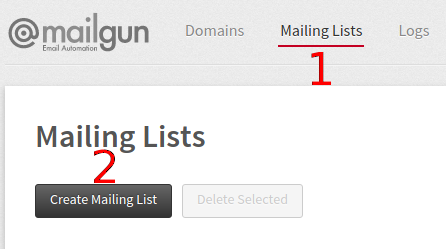
1. Create Mailgun mailing list
Once you've set up your Mailgun domain just go create a new mailing list.
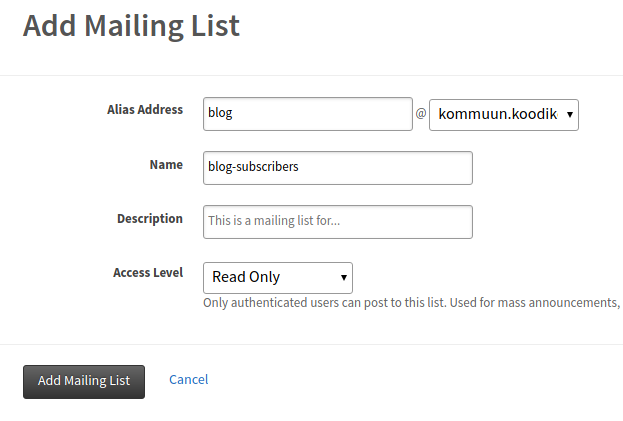
Read-only means that your users can't contact eachother, which is what we want. FlowXO will call the Mailgun API and that basically has admin rights.
2. HTML Form
Since you're still reading this post you've got the skills to figure out your own form right? Here's mine anyway:
<form action="">
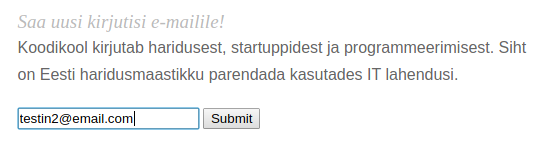
<h2>Saa uusi kirjutisi e-mailile!</h2>
<p>Koodikool kirjutab haridusest, startuppidest ja programmeerimisest. Siht on Eesti haridusmaastikku parendada kasutades IT lahendusi.</p>
<input name="mailinglist" value="blog@kommuun.koodikool.ee" style="display: hidden;"/>
<input name="email" type="email" placeholder="sinu@mail.ee"/>
<input type="submit"/>
</form>
Okay there's a few things to notice.
- The form's "action" attribute is empty. We don't yet know the URL of the FlowXO webhook, so don't deploy your code yet!
- There's a hidden field with
name="mailinglist"and it's value is what we're going to use later. Try think of it as a JSON object:{"mailinglist": "blog@kommuun.koodikool.ee"}.
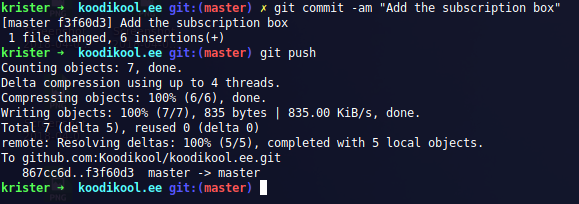
I added this <form> to /home/krister/code/koodikool.ee/themes/hugo-theme-cactus-plus/layouts/partials/footer.html. Now adding code straight to a theme is considered bad practice, but I've made multiple changes and committed the theme code to my main repo so makes no difference to me. Suggest me a better place and I'mm change this text.
The footer is a good place to put it as it shows on every page.
3. Create a FlowXO Flow
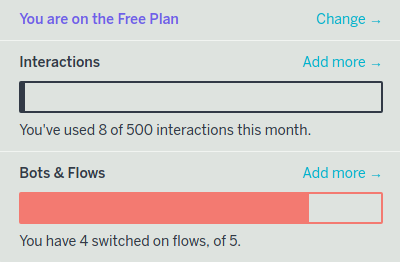
You clearly need an account first of course. You don't get to make a lot of bots on the free plan, but the number of interactions is sure plenty for my needs.
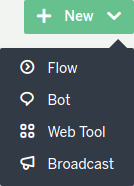
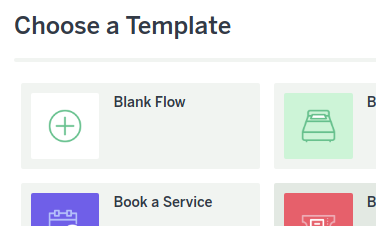
Now create a new flow.
A "Blank Flow" suits us just fine. No predefined flow makes our job any easier I'm afraid.
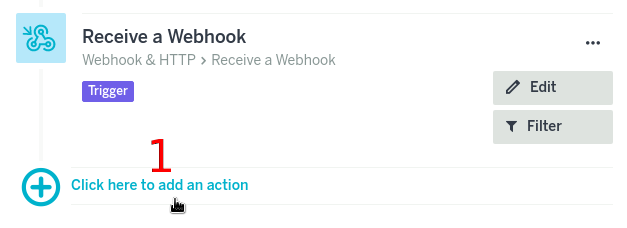
Select "Webhook" as the first trigger. You may see two of them, either should be fine.
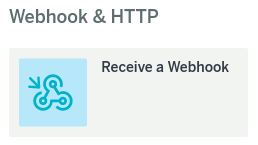
Here's what you should see now:
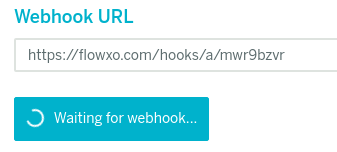
Now the webhook is waiting for us to call it so it knows what data to expect. So pop on over to our website code and put that webhook link into the form's action="" attribute.

Now deploy your code and submit that form with test data! Yeah you'll have a dead form on your site for a while, but at least this tutorial is kept to a minimum ;)
Don't know how to deploy? Consult the Hugo docs or the docs of whatever static site provider you're using.
All I needed to do to deploy was this:
Awesome. Netlify compiles Hugo itself, wonderful.
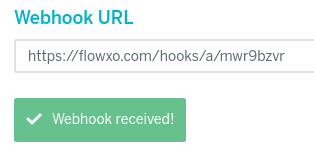
Once it's deployed I'm submitting my form with test data.

Which returned the message Webhook received OK, but the workflow corresponding to this webhook could not be found. If you are currently setting up a workflow, this is normal, and nothing to worry about. :-) which is totally okay since the webhook got fired!
Just click "Next" and "Save" to move on. Filters are useful if you want to stop the webhook from reacing in a certain circumstance. For example you may have a <input name="honeypot" /> that only bots will fill and the FlowXO filter can disregard those POSTs.
So we've set up the webhook. Let's have it send our data to the Mailgun API. Go ahead and add a new action by that almost invisible plus button.
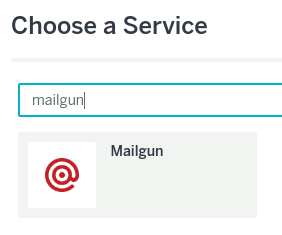
We could make a custom HTTP request, but there's a Mailgun integration so let's use that instead.
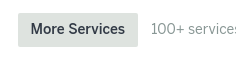
Find the "More Services" button and search for "Mailgun".
On the next screen leave the selection to the default. As adding a new member to the list is what we need.

I've already got some services set up which I don't want to risk breaking so you're on your own on this copy-paste task. I'm sure you can handle it. If not let me know and I'll put more effort in :)
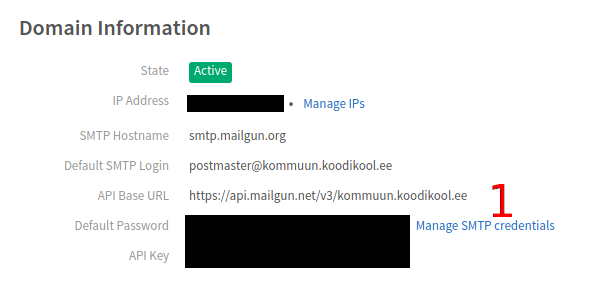
The info you need is under the Domain menu.
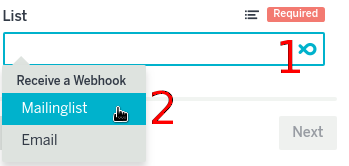
On the next screen click the wobbly icon in the end of the input. Notice that the available selection is there because of the initial POST request we made from the <form>. FlowXO is clever like that. However if you want to change the fields, you'll have to create a new webhook, which is annoying.
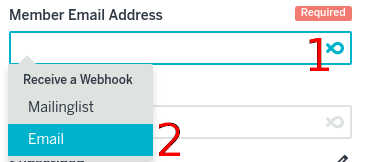
The "List" input has a trick. We want to tell it to use the form field "mailinglist" for knowing which mailing list to add the user's email to. But the squiggly icon is gone! Just click the pencil button first.

And then you can continue as usual.
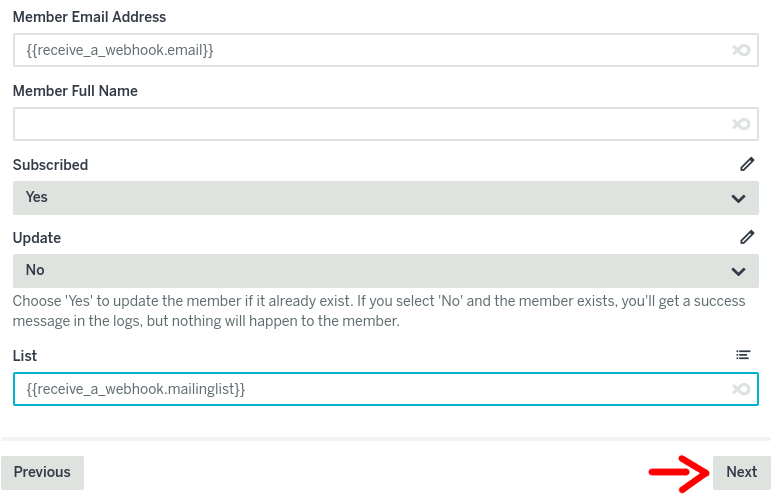
Here's the whole form. I didn't ask for a name from the user so that's empty.
NEXT! Boy this tutorial is way longer than I had anticipated. I hope you're appreciating this writeup :)
Skip the Filters screen again with the "Save" button.
This is crucial: turn this flow on!

Result
Okay, here we are. Are we done? Let's check.
Put in a test email (again) on your website.
Which now returns with success. Status: 200.
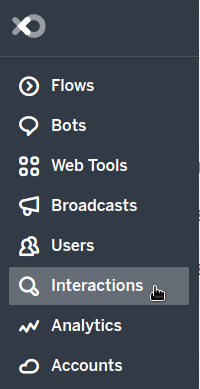
You can check if FlowXO got the message from the Interactions menu.
In my case the webhook did go through.

Last thing to check is the mailing list on Mailgun.
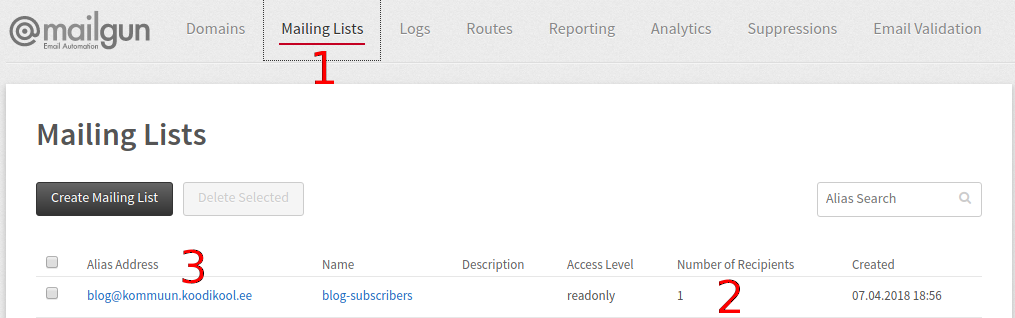
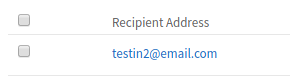
And voila! Someone has subscibed to the list. Click on the name for details.
Done!
So how do you use this thing? There are two ways. Either by setting up an authenticated email in the SMTP settings:
This way you can just send an email to the mailing list address and the email will get distributed automatically. This is a Gmail (or whatever provider) specific issue rather than Mailgun.
Second option is to use the API.
In my case I'm a Linux nerd so I haven't had a reason to go further than just the bash command curl. In fact all I do is I write the email I want to send in a file called email and send it with a curl command for this purpose. Easy for me. Not so easy for you I imagine. So drop me a line if you get stuck and maybe I'll write an easier solution :)