
Updated: 2020-04-10.
Here's a free automated tool I made for fun so you don't have to go through this tutorial (it'll save you a good 20 minutes). This is the most popular blog post I have with 500 visitors a month. Saving 20 minutes each would be an amazing 7 days of work saved total. If you prefer learning the manual process however, I do update the post when needed and answer comments. You're welcome!
Mailgun doesn't offer the free-forever tier anymore, but their API is really easy to use and the pay-as-you-go pricing is very cheap in low volumes and the services very competetive in high volumes. Plus only great experiences with support.
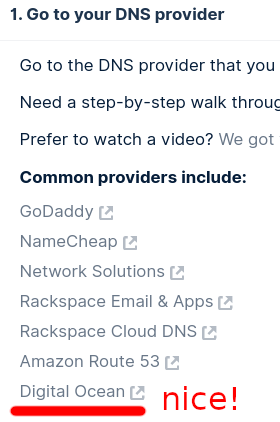
DigitalOcean is probably the most comfy cloud server provider available with pretty cheap pricing too.
These two are my go to services, but how exactly do I connect my domain (with nameservers in DigitalOcean) to Mailgun? It's not hard, but the details can be confusing.
1. Register account on Mailgun
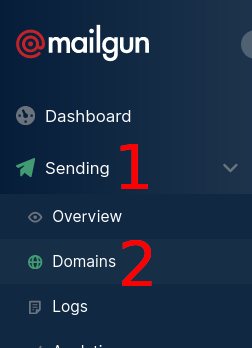
2. Add your domain
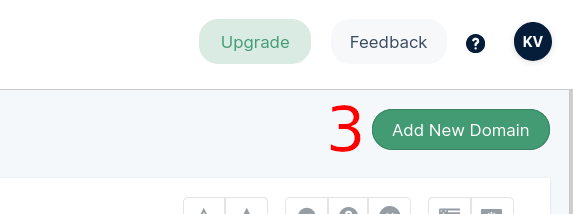
After registering you'll probably see the Add New Domain button right there, but just in case, it's under the Sending -> Domains menu:
And at the top-right corner:
Enter a domain you own.
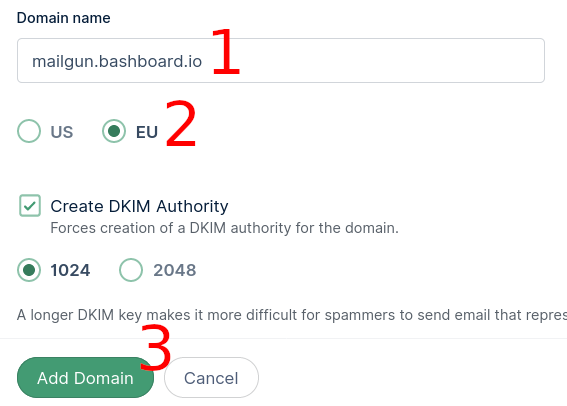
Let's explain a few options.
Subdomain or no subdomain
The majority of cases you'll want to use a mailgun subdomain. Most probably you'll be using Mailgun to send emails from your automated system, right? And you'll have a side-email service like GSuite or Fastmail for your manually-sent emails. So the automated and manual emails are best kept separate.
Only use the no-subdomain option if you're actually building a send-and-receive server and you wont be using other email services.
US / EU server
If you're in the EU and especially if your customers are in the EU, you'll want the servers to be in the EU. You can also read more about GDPR and EU.
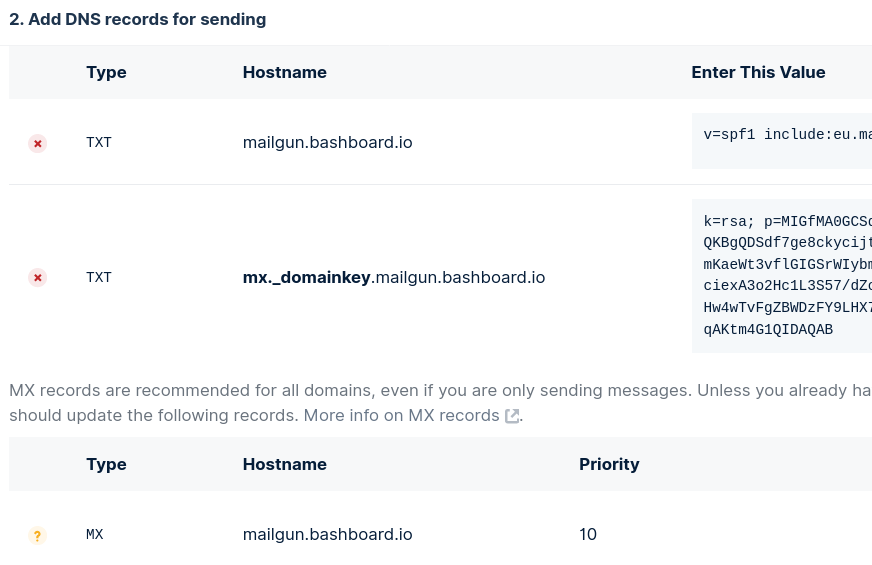
3. Find your DNS settings
You should have been redirected to the Overview screen with DNS settings. To find it manually go to Sending -> Domains and click on your domain. Here's part of my info (image is cropped):
Shoutout to Mailgun for sponsoring this very post! I'll be keeping this post updated (so comment if it isn't).
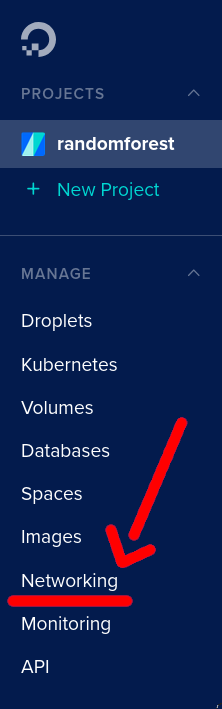
4. Enter DNS details into Digitalocean
Assuming you're already logged in, go to the Networking menu:
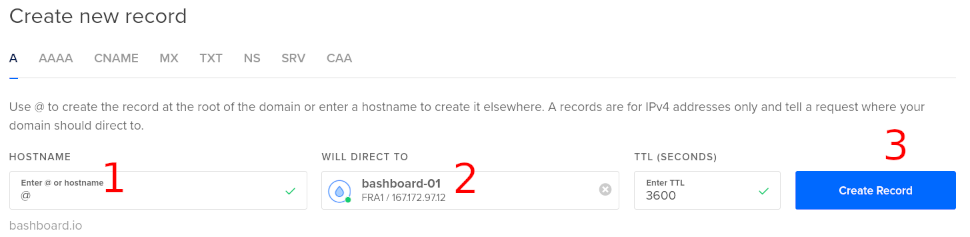
And add your root domain (or select it if you've already created it):

And this is the screen where we enter that data from Mailgun - finally!
4.1 Sidetrack: You probably want an A record
If this is indeed a new domain you'll be entering, you'll need to select a server to connect the A name to. This is nothing to do with email. If a user comes to your domain (or bashboard.io in my case) they will reach my server. Standard DNS practice, but this isn't what you came here for, so lets move on.
Back to 4: Entering DNS details to DO
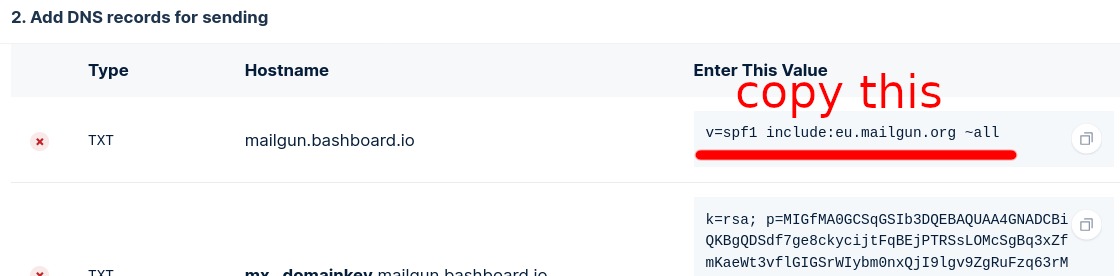
It's really just copy-pasting matching values. Here's an example with a TXT field:
Take the value from Mailgun:
Now on DigitalOcean create a TXT value:
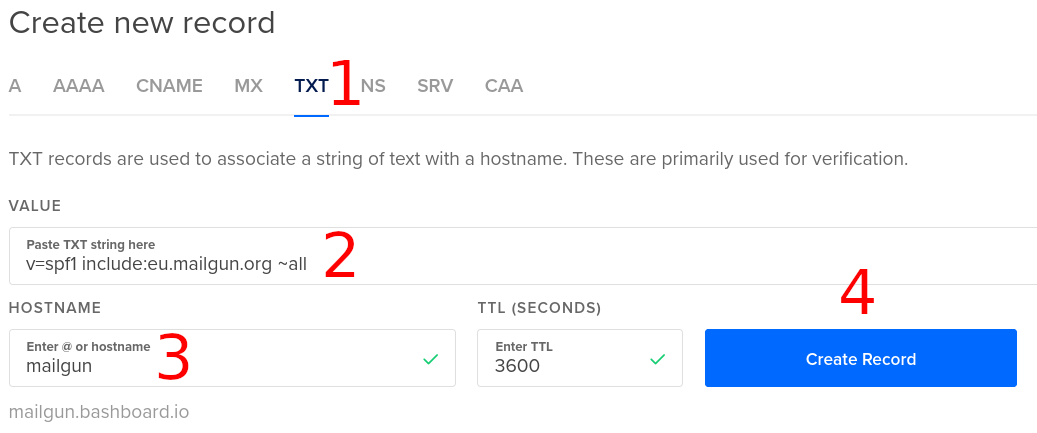
Notice that "mailgun.bashboard.io" hint under Hostname? That is super helpful. Wasn't there when this post first was released.
So fill in the rest of the effin data. The result should look something like this:
What the hell are these TXT values anyway? I find Wikipedia to be simplest to understand, yet accurate. Read both SPF and DKIM.
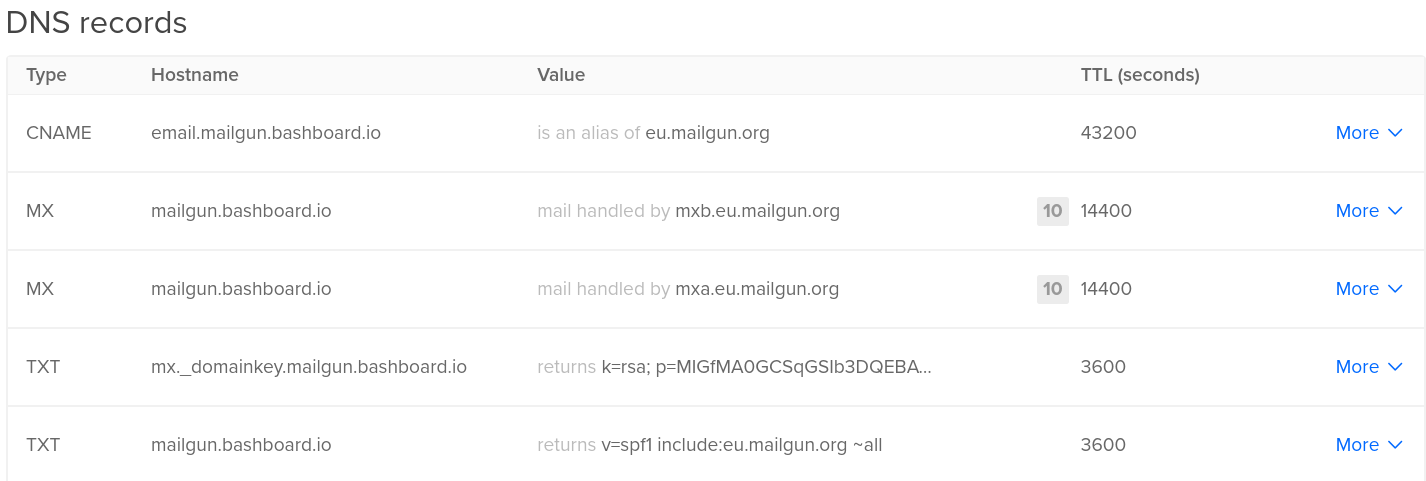
MX is optional: this is the part that enables Mailgun to receive your emails. For example when you send out an email and the user responds to it. Most servers I've made don't deal with incoming emails, but I do still fill in MX and tell Mailgun to redirect all incoming mail to my personal address.
CNAME is optional: I highly suggest you fill this in also so you can see when your emails are opened and links clicked on. Very useful.
What is TTL? Seconds until the network forgets your DNS details and will come asking for them again. Generally it's fine to leave default settings. Read more.
Note: Mailgun uses .org as an extension! In case you were typing the values by hand.
5. Wait for DNS propagation
It can take up to 24h for these new values to propagate across the DNS servers.
As a result of this distributed caching architecture, changes to DNS records do not propagate throughout the network immediately, but require all caches to expire and to be refreshed after the TTL.
from Wikipedia.
If you're in a hurry you're welcome to keep digging at the Verify button.

You'll get an email when it's done so no real need to hang around. And no, there's nothing you can do about this wait. Life is hard, I know.
6. Actually send an email from your system
Every backend system is different, but generally you'll want to
- Figure out the Mailgun API documentation
- Check if there's a library for your framework.
- Get your API key ready from Settings -> API Keys

So that's it!
This post has been up since 2014. Since then Mailgun and DigitalOcean have improved this process immensely! I've also updated this post accordingly many times.
Over 60k people have been through here! It's pretty cool. So I've made sure to keep this post updated. Today (2020-04-10) I did a total rewrite!
Anyway - if something doesn't work let me know in the comments.