
Note: If you already have a PostgreSQL database instance from Digitalocean, you don't need this tutorial. Just follow the Getting Started from the official TimescaleDB docs. No need to install anything, DO is super nice that way (unless your instance is old).
Scalable solutions for PostgreSQL are many. For TimescaleDB? Not sure, it's hard to tell what cloud service is scalable and what isn't. And I'm not about to roll my own.. didn't end well last time.
Digitalocean has database "droplets" for a while now with the scalability options you'd expect. How to combine Timescale with Postgre is a little hidden, so here's me making a tutorial while figuring it out.
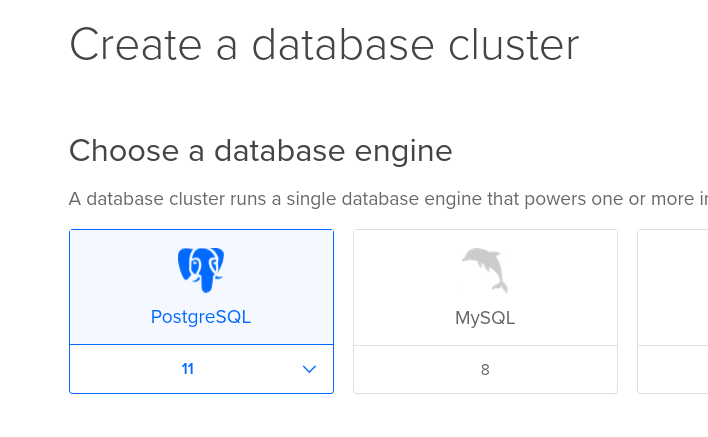
For sure, do NOT create an Ubuntu droplet! You'll then have to replicate manually, if you need to scale.
Create PostgreDB
In Digitalocean, Create a Database:
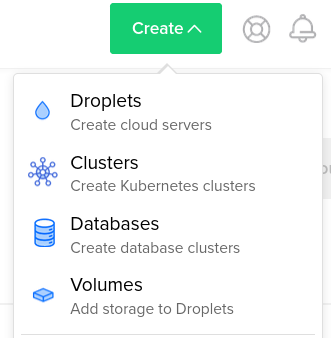
I'm sure you can figure the creation process out for yourself.
In the Getting Started section, make sure you limit the connections, as otherwise people from all over the world may move in. Or rather, bots.
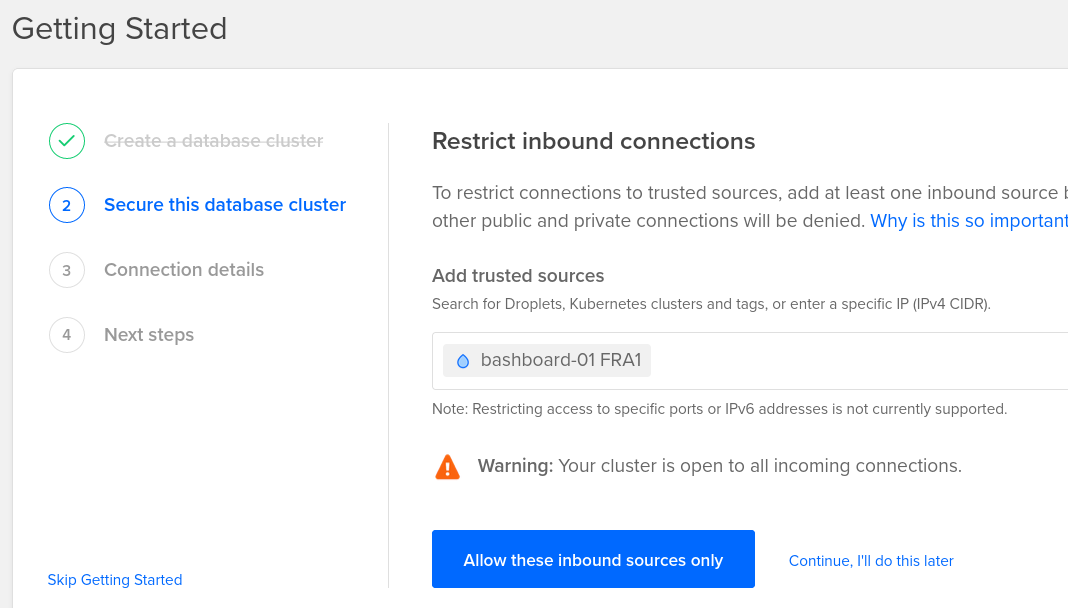
Make sure you backup the connection details. They will be available later also, but I feel safer having them in my own computer too.
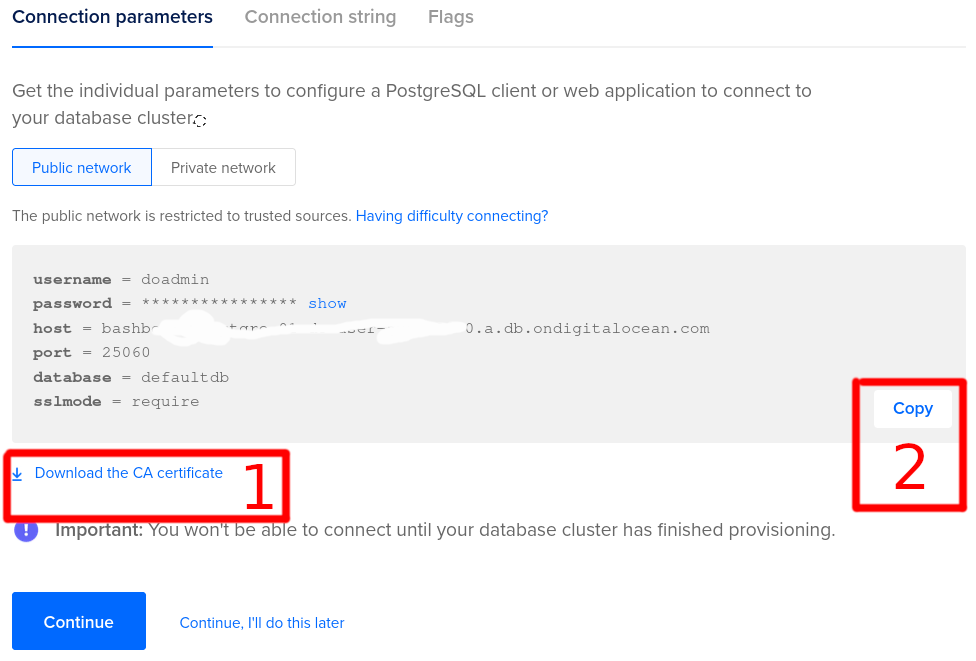
Make sure you also note down how to connect to the instance.
Connection pools are a good idea, but let's skip that for now.
Nice! We're done with the easy part. Let's rock on!
Install psql on your machine
You must have psql installed. Here's a few popular commands:
# Ubuntu
sudo apt install postgresql postgresql-contrib

# Arch Linux
yay -S postgresql

# Arch Linux puritans
sudo pacman -S postgresql

# What else is there.. oh, yeah

# Mac OS
brew install postgresql

# Windows
rm -rf /
# okay, okay.. https://www.postgresql.org/download/windows/
Connect to your DB instance
Remember that IP restriction we put on our DB? Only our server can access the DB. This is a good thing. So to access you have two options:
- Add your work IP (if static) to the allowed list
- Connect to your server first, then to the DB with
ssh root@bashboard.io
Okay so now..
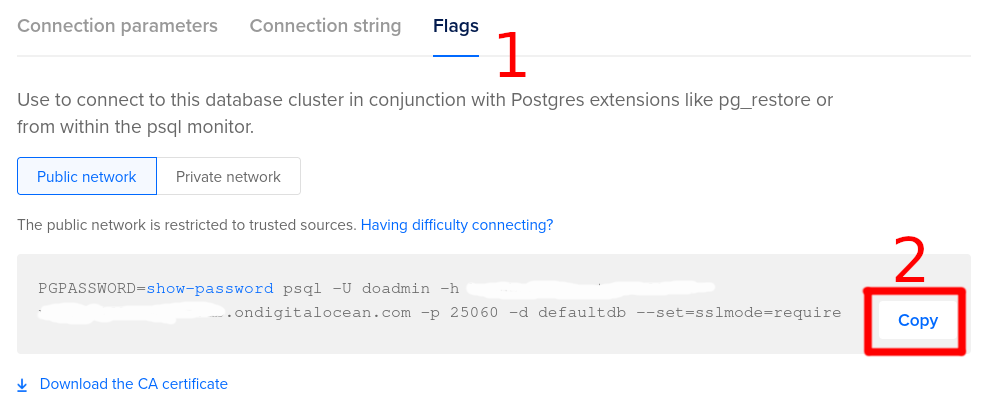
That connection command (last screenshot ^) - use it to connect to your database (having completed one of the two steps above). Here's mine.
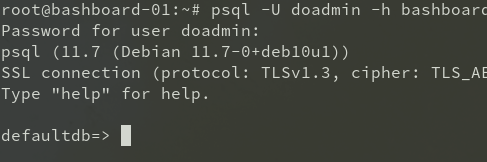
PGPASSWORD=b4myeahrightodk psql -U doadmin -h myhomeaddress.ondigitalocean.com -p 25060 -d defaultdb --set=sslmode=requireIf you connected successfully you should see something like
But this is grade school stuff. You know all this. You came here for what's about to follow. Hey relax, I'm just making sure noobs get through this! When I was one, I hated the rest of the effin owl type tutorials. I'm sure you understand.
Configure Postgre to use the Timescale extension (the rest of the owl)
TimescaleDB is an extension for PostgreSQL. If you had a normal Ubuntu instance you'd have to apt install it, but Digitalocean has conveniently done all the heavy lifting, we just need to enable it.
Some links if you want to learn more:
- Digitalocean: List of supported postgre extensions
- PostgreSQL: CREATE EXTENSION documentation
- TimescaleDB: Getting Started (configuring the db)
-- Create the database
CREATE database bashboard_prod;

-- Connect to the database
\c bashboard_prod

-- Extend the database with TimescaleDB
CREATE EXTENSION IF NOT EXISTS timescaledb CASCADE;

-- You're getting free stuff, so be nice
ALTER DATABASE "bashboard_prod" SET timescaledb.telemetry_level = 'basic';
Omg is that it?
Sure looks like it. I'm going to take time to port my app over to this instance and come back here if any issues are raised.